Showing posts with label tutorials. Show all posts

Thursday, August 16, 2012

Doubling up for the Freezer


FAST FOOD FRIDAY...

"I'm too busy to cook."  "I worked all day."  "I'm Tired."  "It's way too hot out."  "I don't really want to go to the store."   Who hasn't heard or even said these words before?  Should you call for pizza?  Should you pick something up from the nearest drive through?  Nope, neither.  All you need is a little Food Fore-thought.  Fast Food Friday, a planned weekly post, isn't about running out to a local restaurant for take out or calling for delivery.  Fast Food Friday is about having something on hand for those days when cooking just seems impossible or even unappealing. 

With a little planning and preparation, fast food can come straight from our cabinets, pantries, and freezers.  What we are really talking about here is food preservation.  Food preservation can change our future days - take the guess work out of meal prep, allow for an evening of rest not stress, change your grocery bill's bottom line, and of course, nix the expense of drive-thru eatings.  Now those points do sound appealing.

So for many many Friday's to come, check back to see how I plan to never be too busy to cook, not too tired to eat well, not considering if it's too hot out, and best of all, skipping trips to the store.  For today, let's talk about...


Doubling Up

or tripling, or quadrupling for that matter.  Last Friday, I shared my four favorite ways to save time in the kitchen and help simplify things.  It never seems to fail.   There are always days when the idea of having to cook a full meal is just too much.  That's why I like to have food on hand that's quick and easy.  Something that works well for us to have on hand is frozen lasagna.  NOT the store bought kind.  There are way too many things on that label I know I could do with out even if I could pronounce them.  Plus, making lasagna from scratch means I get to control the ingredients and the size.

I like to plan a ahead and prep two or three when I feel like cooking.  We'll have one for dinner and the other(s) go in the freezer.  Then the next time around, all that needs to be done is heat and eat, and perhaps fix up a green salad while it's cooking.  The lasagna I fix is pretty simple, but I suppose the possibilities are somewhat endless.  Around here, we like a meat lasagna with sweet Italian sausage and ground beef.

The trick to successfully freezing the extra lasagna(s) is to flash freeze it in the casserole dish that you'd cook it in.  I do this by lining the dish with saran wrap before building the lasagna in the dish.  Once constructed, dish and all go into the freezer for a couple of hours until it is firm enough to pull out of the dish in one piece with out being flimsy.  The dish goes into the sink and the partially frozen lasagna gets double wrapped in saran wrap and then in foil and goes back into the freezer until I'm ready to cook it.  There are pics below, but I'll share the recipe first.  This recipe makes a 9 X 13 pan or two 8 X 8 pans which is what I typically do.  Of course, you would want to adjust pan size and quantities according to your family's needs.

Meaty Lasagna- makes two 8 X 8 dishes

1 Box of lasagna noodles, cooked and drained
1/2 pound of Italian Sausage, browned
1/2 pound of Ground beef, browned
3 cups of sauce
1 24 oz container of cottage cheese
1/2 cup of Parmesan cheese
3 cups of mozzarella
2 eggs
1 cup of mozzarella for topping.
Additional Parmesan to taste.

Combine cooked meats in one bowl and set aside   Combine all cheeses (except one cup of mozz) and eggs in another bowl and set aside.  To build lasagna, begin by putting a small amount of sauce in the bottom of your pan to prevent sticking*.

  1. Place one layer of noodles in bottom of pan. 
  2. Spoon one quarter of the cheese mixture onto noodles.  Spread evenly to cover.  
  3. Place a layer of noodles over cheese.  Pour one quarter of sauce onto noodles.  
  4. Sprinkle half of ground meat mixture onto sauce.  Spread evenly to cover.  
  5. Place a layer of noodles over sauce. 
  6. Repeat steps two and three.
  7. Sprinkle 1/2 cup of reserved mozzarella over top.
  8. If you are building two lasagnas, repeat directions with remaining ingredients.
Bake in a 375 degree oven for 50 - 55 minutes if frozen or 25 - 30 minutes if cooked fresh.  Be sure to remove all saran wrapping from frozen lasagna.


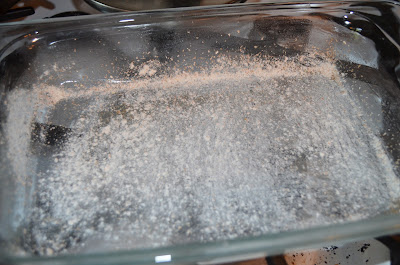
*If prepping lasagna to go into freezer, line dish with saran wrap first as seen below.


Meaty Lasagna- Pictures edition...

Boil noodles al dente.


Prepare Italian sausage by slicing through casings to be removed.


Peel casing off each sausage and dispose of casing.


Begin browning sausage in skillet over medium high heat.


Cook sausage thoroughly.  Do the same for ground beef.


Drop everything and put fancy shoe on build a bear so that she can attend the ball while you, Cinderella, stay home and cook. Just Kidding ;)  This is just one of many interruptions in the life of a mommy with an eight year old. 


Back to business, combine cheeses and eggs.


To begin building lasagna, put a small amount of sauce in the bottom of your pan to prevent sticking.


If need be, cut noodles to fit dish.


Place one layer of noodles in bottom of pan.
Spoon one quarter of the cheese mixture onto noodles.  Spread evenly to cover.


Place a layer of noodles over cheese.  Pour one quarter of sauce onto noodles.
Sprinkle half of ground meat mixture onto sauce.  Spread evenly to cover.


Repeat layer of noodles and cheese.


Top with last layer of noodles, sauce and reserved mozzarella.


This dish of lasagna is now ready to go into the freezer.

After two hours, take lasagna out of freezer and remove from dish by pulling up on saran wrap.


 Double wrap with saran wrap.


I also double wrap with foil.


Place back into freezer until needed.  I have kept it frozen for up to three months with no problems.  When ready to cook from freezer, remove all wrapping before placing into original dish and cooking.

So that's it - another way to make future meals a little easier by spending a little extra time when you have it.

Have you tried this?  What kinds of recipes do you double up and freeze?

This post is shared with Food Renegade.

Thursday, August 2, 2012

Eating Our Veggies - Carrot Cake


Eating our Veggies 

Yesterday's CSA brought carrots.  I immediately thought about a roast with carrots and potatoes.  Yeah, but I also had a sweet tooth.  So I changed my mind from roast with carrots to carrot cake.  A much better decision if I do say so myself.   What a wonderful way to get our veggies in.

This recipe was adapted from a carrot cake recipe on Allrecipes.  First, I had to scale it down because I knew I wouldn't have enough carrots.   I love that Allrecipes does this for you.  All you have to do is enter the number of servings you want.   I also had to make some changes based on what I had on hand.  Traditional carrot cake calls for cream cheese frosting but I had to nix that with no cream cheese on hand.  For this version I went with whipped cream frosting.

Carrot Cake
Note * Double recipe for a 9 x 13 size cake.

1 1/2 cups of shredded carrots
2 eggs
1 cup of sugar
1/2 cup oil ( I used olive)
1 cup of flour ( I used whole wheat)
1 teaspoon of baking powder
1/4 teaspoon of salt
1 teaspoon of cinnamon


Combine carrots, eggs and sugar.  

Mix well.  

Add in oil and mix. 

Add in flour.   Mix until combined. 
 Add in baking powder, salt and cinnamon.  Mix until combined.

 Pour cake batter into a greased/floured 8 x8 cake pan.  
My pan is a 7 X 11... close enough.


Bake at 350 degrees for 35 - 40 minutes.  

Wait till cake has cooled completly before frosting.


Whipped cream frosting

1 16 ounce carton of heavy whipping cream
1 - 2 tablespoons of sugar

Whip the cream on a medium high setting until it begins to thicken.  Add in 1 to 2 tablespoons of sugar depending on your liking and whip until stiff peaks form.  
Almost over mixed.  Another minute or two and it would have been butter.

Here is the recipe with out pictures.

Carrot Cake

1 1/2 cups of shredded carrots
2 eggs
1 cup of sugar
1/2 cup oil ( I used olive)
1 cup of flour ( I used whole wheat)
1 teaspoon of baking powder
1/4 teaspoon of salt
1 teaspoon of cinnamon

Combine carrots, eggs and sugar.  Mix well.  Add in oil and mix.  Add in flour, baking powder, salt and cinnamon.  Mix until combined.  Pour cake batter into a greased/floured 8 x8 cake pan.  Bake at 350 degrees for 35 - 40 minutes.  Wait till cake has cooled completly before frosting.

Enjoy :)

Shared with Simple Lives Thursday and Fill Those Jars Friday.

Thursday, July 26, 2012

Pizza Crust for the Freezer


FAST FOOD FRIDAY...

"I'm too busy to cook."  "I worked all day."  "I'm Tired."  "It's way too hot out."  "I don't really want to go to the store."   Who hasn't heard or even said these words before?  Should you call for pizza?  Should you pick something up from the nearest drive through?  Nope, neither.  All you need is a little Food Fore-thought.  Fast Food Friday, a planned weekly post, isn't about running out to a local restaurant for take out or calling for delivery.  Fast Food Friday is about having something on hand for those days when cooking just seems impossible or even unappealing. 

With a little planning and preparation, fast food can come straight from our cabinets, pantries, and freezers.  What we are really talking about here is food preservation.  Food preservation can change our future days - take the guess work out of meal prep, allow for an evening of rest not stress, change your grocery bill's bottom line, and of course, nix the expense of drive-thru eatings.  Now those points do sound appealing.

So for many many Friday's to come, check back to see how I plan to never be too busy to cook, not too tired to eat well, not considering if it's too hot out, and best of all, skipping trips to the store.  For today, let's talk about...


Pizza Crust for the Freezer

Last Friday, I shared that I buy pizza ingredients in bulk to save money.  Having pizza on the menu once a week can be expensive if you're eating out.  We are frequent-flyers when it comes to eating pizza.  Considering that a month's worth of take out  pizza was costing us $100+, something had to give.  So I began making pizza at home.  We now eat pizza every week for $25.00 a month.  That's quite a savings.  So it totally makes spending a little time preparing crusts and portioning ingredients worth it.


Pizza Crust for the Freezer
(makes three crusts)

9 cups of flour
2 TBSP of yeast
1 TBSP of salt
1 TBSP of honey
4 TBSP of olive oil
2 1/2 cups of warm water (110 -120 degrees)

Start by adding 3 cups of flour and the other ingredients to your mixing bowl.  (Reserve 6 cups of the flour.)  Set mixer on low for three minutes.  When mixture resembles smooth cake batter, begin adding  three cups of additional flour one cup at a time.  Mixture will become stiff like cookie dough.  At this time, switch to working with a dough hook or turn out onto a floured surface to knead by hand.  Working with a dough hook, you want to add in an additional 2 1/2 cups of flour slowly until dough forms a solid ball and the sides of your mixing bowl is clean.  Kneading by hand, you will knead in the 2 1/2 cups of flour slowly until the dough forms a clean ball that is no longer sticky.

Place dough into a large bowl and cover to rise with a damp warm towel for one hour.  Dough will double in size.  After the hour is up, flour the back of your hand and press down dough.  Turn dough out onto a floured surface and begin pressing it in to a flat circle.  Score the dough with a large Y which will evenly divide it into thirds.  Cut dough into thirds.  Working with one piece of dough at a time, form piece into a ball and then press flat onto the floured surface. Flip dough and begin rolling it out with a rolling pin.  Roll in varying directions to achieve the desired pizza size and shape. 

Lightly fold dough in half and then in half again.  This makes for easier transfer to a baking stone.  Transfer to the stone and unfold.  If needed, shape dough to better fit stone.  You can do this by gently pressing or pulling at the dough.

Bake in a 400 degree oven for 6 minutes.   This partial bake time allows the dough to dry and stiffen for easier freezer storage.  Allow crust to cool completely.  Wrap completely with saran wrap.  Crusts can be stacked and put in freezer.  Crusts will last for up to two months.

To prepare pizza, preheat oven to 400 degrees.  Put frozen crust on to baking stone while oven is preheating.  Add sauce, cheese, and toppings to your liking. (If using meat topping such as ground sausage, it needs to be precooked.)   Bake for 15 minutes or until cheese is golden brown.  Crust can be placed directly on oven rack for a crispier crust.  If doing so, use a pizza peel for easy transferring.

Here it is broken down with pics...


Start by adding 3 cups of flour and the other ingredients to your mixing bowl.  (Reserve 6 cups of the flour.)  Set mixer on low for three minutes. 


Begin adding  three cups of additional flour one cup at a time.  Mixture will become stiff like cookie dough. Add in an additional 2 1/2 cups of flour slowly until dough forms a solid ball and the sides of your mixing bowl is clean. 


Place dough into a large bowl and cover to rise with a damp warm towel for one hour.  


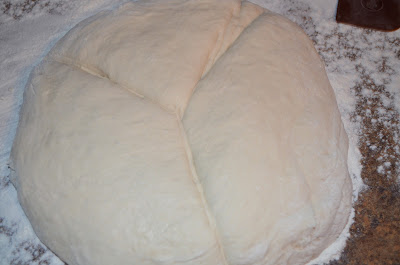
Dough will double in size.  After the hour is up, flour the back of your hand and press down dough.  Turn dough out onto a floured surface and begin pressing it in to a flat circle.  Score the dough with a large Y which will evenly divide it into thirds.  Cut dough into thirds.


Working with one piece of dough at a time, form piece into a ball and then press flat onto the floured surface. Flip dough and begin rolling it out with a rolling pin.  Roll in varying directions to achieve the desired pizza size and shape. 


Lightly fold dough in half and then in half again.  This makes for easier transfer to a baking stone.


Transfer to the stone and unfold.  If needed, shape dough to better fit stone.  You can do this by gently pressing or pulling at the dough.


 Bake in a 400 degree oven for 6 minutes.   This partial bake time allows the dough to dry and stiffen for easier freezer storage.  Allow crust to cool completely.  Wrap completely with saran wrap.  Crusts can be stacked and put in freezer.  Crusts will last for up to two months.


Since we always make pizza in twos, I make this recipe twice so that I have six crusts going into the freezer. Now for the next three weeks, I'll have the makings for pizza on hand.  Which is nice for saving money, but also when cooking efforts need to be kept to a minimum.  Once again, it's about spending a little time now when you have it to make life easier in the future.


So, enjoy, and be thinking of how you can make life easier in the future.

This post is shared with Food Renegade.

Monday, June 25, 2012

No "Knead" to Have a Machine...


When I started making bread a couple of years ago, I didn't have a bread machine or a stand mixer with a dough hook.  However, I was determined not to let that stop me.  The thought of making bread from scratch  fascinated me - from a few simple ingredients to a warm comforting loaf of bread.  There would be no need for a trip to the store nor would there be a need to frown at the rising cost of that pre-made tube of dough that I could toss into a preheated oven.  Plus, the smell of yeast and baking bread are incredible.
Baking bread does not require special equipment, and is done quite easily once you get the hang of it.  So today's post is how to make a French loaf which can be used in oodles of ways.  The simplest of course is to slice it with dinner and smoother it with butter.  Plus there is  the obvious French toast.

Other ways could be to slice it longways and use a hoagie style roll.  This is great for Italian beef sandwiches or sliced grilled chicken.  You can also use it to make french bread pizza.  At the end of the week when  you've all but used it up, it can be made into bread crumbs or croutons.


All you need is a few simple ingredients...
This is a doubled recipe and will make two loaves of bread.
  warm water...
{2 cups for a doubled recipe}
Next, add a hand mixer...
[You could do this part by hand too.]
After you've mixed for two to three minutes,
This is about all my hand mixer can handle before I have to start mixing in flour by hand to stiffen the dough.
Then,
You'll want to stir in additional flour by hand so that the dough is not runny when you begin to knead.

Now from this point it's easier to show and tell with video.


Once it's all rolled and ready to go, put it into a preheated oven at 400 degress.  I usually cook mine for 25 to 30 minutes.


Time to review:

  • For two loaves, start with 2 cups of flour, 2 Tbsp of sugar, 5 1/2 tsp of yeast (two small packets), 2 tsp of salt, and 2 cups of warm water.
  • Mix everything by hand or with a hand mixer until it resembles cake batter (3 min).
  • Add additional flour 1/2 cup at a time until you get the consistency of cookie dough.
  • Sprinkle flour onto clean surface/counter top and turn the dough out onto surface.
  • Knead the dough by pushing down and away from you, fold top half back towards you, push down and away again, give it a quarter turn and repeat.
  • Knead for three to five minutes (adding flour to surface as needed) until dough is not sticky.
  • Place dough back into bowl and cover with warm towel.
  • Let rise for one hour.
  • Punch down dough and turn out onto floured surface.
  • Roll out the dough to a quarter inch thick rectangle.
  • Starting at one end, fold about an inch of dough over and continue until it is rolled to the other end.
  • Bake in a 400 degree oven 25 - 30 minutes.
  • Enjoy :)