Wednesday, September 26, 2012

Chilly Today

Chilly Today


The temperature has dropped significantly here.  There is a serious chill in the air.  So much so that I'd like to turn on the heat.  That would be a shame though considering I feel like we just turned off the air conditioning.  Shouldn't we be able to get a least a month or so of not having to pay for air or heat?  I like to think of September and October as those months when no help from the power company is needed, but the floor is cold and so are my feet.

No, I have no intentions of cracking and turning on the heat.  Instead, I'll just compromise.  The oven is on.  The kitchen is warming.  The smell of Jalapeno Cheese Bread fills the air.  Chili is simmering on the stove.  A hot bowl or two should definitely take the chill off.  And since I thought you might be chilled too, I'm sharing my recipe today.  It's sweet with a background of heat from the jalapenos.


Chili
1/2 large onion, diced
1- 2 jalapeno peppers, seeded and diced
1 Tablespoon of oil
1 1/2 pounds ground beef
2 16 ounce cans of chili beans  
1/2 cup of ketchup
3 Tablespoons of brown sugar
1 Tablespoon crushed red pepper
salt and pepper to taste
1 cup water

In a large stock pot or dutch oven, saute the onion and pepper until soft.  Add ground beef and cook over medium heat until browned.  Use a spatula to break up ground beef into smaller pieces.  Add two cans of  chili beans, 1/2 cup of ketchup, 3 T of brown sugar, and seasonings.  Simmer for twenty minutes.  Thin with small amounts of water as desired.

The nice thing about chili is that you can tweak it to your liking.  I like to use Bush's Best Chili Beans in medium sauce.  My kids like the sweetness and the heat is not too much for them.  Of course, it's good to doctor it up with a sprinkling of cheese, some sour cream, and more onions.

ENJOY :)

This post is shared with Food Renegade and Old Fashion Recipe Exchange.

Tuesday, September 25, 2012

Tomato Sauce

Putting Up Food - Tomatoes


As I've said in the past, I like to make pizza from scratch to help keep the budget in check.  We eat pizza once a week so ordering out all the time would get costly.  Something else I've started doing is making my own tomato sauce to go on our pizza.  It's not about saving a buck though because tomato sauce for the most part is pretty cheap at the store.  Making my own sauce is more about the self satisfaction I get from growing our own food and going local to help support local farmers.

I started a few tomato plants back in late May, but due to our shady yard, they've been few and far between and slow to ripen.  Hence, I started a tomato collection in the freezer.


Every time we had ripe tomatoes on the vine, they got put into a freezer bag to await their fate of becoming sauce.  Once nice thing about freezing tomatoes for sauce is that the skins slip right off when you run them under warm water.  This makes for super easy processing.


I wish I could say that I relied completely on my own plants to provide enough tomatoes for sauce, but I can't.   Thankfully though, my CSA provider was able to sell me some at a good rate.  I picked up seventeen pounds for $10.  Being fresh tomatoes, they take a little more effort to get them peeled.  A pot of boiling water works best.  You just slice an X into the bottom of the tomato and then drop it in the boiling water for about 30 seconds.


When you pull the tomatoes out and they begin to cool, the skins begin to pull away.  I wait till they are cool and slip the skin right off.


With the skin off, I cut off the top end.  That's all the cutting I do.  Rather than chop, I gently squeeze each tomato over a large bowl to expel excess juice and some seeds.  The remaining pulp gets thrown in to my stainless steel pot.  Once all the tomatoes have been squeezed and have gone into the pot, they get simmered over medium low heat for two hours.  I mash and stir occasionally as well.


After one hour 

After two hours 

You can see by the residue lines on the inside of the pot that over half of the water has been evaporated.  That's exactly what you want to happen so that you end up with a nice thick sauce.  At this point, I put mine through the blender to make it smooth.


After that, I let it cool in the pot for about an hour.  Then I portioned it out to go into the freezer.  I like to put one cup of sauce into snack size ziplock bags.  This is the perfect portion for our pizzas.  To make sure it's freezer safe, I put the snack size bags into a freezer rated ziplock.


My twenty five pounds of tomatoes yielded 9 cups of sauce.  When I am ready to use these, I just drop one into a large cup of hot water.  When it's thawed, I cut the bottom corner off and am able to squeeze it onto the pizza crust with no mess. 


Monday, September 24, 2012

Green Tomato Salsa

Green Tomato Salsa

So happy to say that last week, I not only got a crate of Concord grapes, but also a large box of green tomatoes from my aunt.  I have to say that it pays to tell people what you're wanting to do in terms of canning.  This is the second time that I have got a response that equals, "Oh, I have that growing in my backyard.  Would you like some?".  Yep.  Saving Money.  Going Local.  Putting up food for future use.  You bet I would.

I am especially fond of green tomato salsa because it makes a great soup addition to my Sausage and Shrimp Gumbo.  I just toss it in during the last five minutes of cooking.  It adds great flavor and helps thicken up the soup.  Other than that, green tomato salsa is also great served over cream cheese with crunchy crackers for dipping.

The recipe I use comes loosely from the Ball Complete Book of Home Preserving.  I have adapted it a little.  I swapped out the lime juice for 1 cup of apple cider vinegar since it's what I had on hand.  I also omitted the cilantro and oregano.

So I started with clean, washed green tomatoes and a few red tomatoes and red peppers (to add a little color).


The tomatoes get peeled and chopped.  I try to remove as many seeds as possible but don't sweat it.  The recipe calls for seven cups of chopped green tomatoes.


Next, I rough chopped two large yellow onions, four jalapeno peppers, and one banana pepper.  You can use any combination of peppers.  I only chopped them into large pieces because I also ran it through the food processor for a finer texture.


 All the chopped veggies then went into a bowl together.


 Then I added some spices - 2 teaspoons of ground cumin, 2 Tablespoons of garlic powder, and  2 teaspoons of pepper.


I also added 1 cup of apple cider vinegar and 2 tablespoons of canning salt.


Once everything was well mixed, I put it on the stove over a medium high heat and brought it to  a boil.  


After 10 minutes of boiling gently, it was ready to be jarred and processed.


Jars were filled to a half inch head space.  Lids then added and bands screwed on until finger tip tight.


Jars get processed in a boiling water bath for twenty minutes.   When twenty minutes are up, the stove gets turned off and the jars rest in the water for an additional five minutes with the canner lid off.  Once the jars are removed, they are allowed to sit for 24 hours undisturbed. 


* If you are in fact thinking of doing your own canning, please refer to a reliable source book such as The Ball Complete Book of Home Preserving for all the exact measurements and details.  Also, always check with your local extension office for changes in time, temperatures, and higher altitude conversions.


This post is shared with Make Your Own Mondays, Fresh Bites Friday, and Homestead Barn Hop.


Wednesday, September 19, 2012

Grape Jelly

Putting up Food - Grape Jelly


The first thing I ever canned was grape jelly.  It was three years ago when I was teaching Family and Consumer Science at a nearby high school.  My co-worker, the shop teacher across the hall, brought me a five gallon bucket of grapes.  Apparently, he was making wine.  I was not that adventurous.  

So I went home that night and looked the "how to" up online, and that began my canning career.  I really had no idea what I was doing or if it would work.  For a long time I wondered if I would make someone sick with my canned goods or even worse yet.  But no, no one took ill.  Instead, I ended up with 12 beautiful jars of translucent purple jelly that some even proclaimed better than store bought.  Yay me.

This year, it was my aunt who supplied me with grapes.  Funny thing is that I didn't even know she grew them.  She hasn't been using them for a few years now and they would normally go to waste.  My cousin suggested she give them to me and in return I'd give her some jars of jelly.  Sounded like a good deal to me.  So when we met for lunch yesterday, I received an enormous crate of grapes. I was back in the jelly business :)


The Business of Making Grape Jelly...


The first thing that needs to be done is to wash and de-stem the fruit.  I set up shop on the deck.  If you decide to do the same, beware of bees.  One arrived, but he wasn't too pesky.  Supplies were easy enough - three containers (one for wash water, one for stems and over ripe fruit, and one for clean grapes) and the hose.


Working from left to right, I set up the grapes, wash bucket, and then two empty buckets.  I took about an hour and a half to repeatedly grab a handful, swish it into the water, de-stem it and place it into the clean bucket.  I ended up with two and a half buckets full.  Each bucket weighed in at just over three pounds.


Because the day was getting away from me, my buckets of grapes went into the fridge.  Today, I've pulled out my Ball Complete Book of Home Preserving and gotten busy.  Referring to page 106, I cleaned the grapes once again, placed them in a stainless steel pot and brought them to a boil.  I boiled them for ten minutes to loosen the skins and juices.  I also mashed them occasionally too.


Next, I lined my strainer with four layers of cheese cloth and placed the strainer over another pot..  Then I scoop the grapes and juice into the lined strainer.  The instructions call for letting the grapes sit for a full two hours to release all the juice - undisturbed.


Your not supposed to press the grapes so that bits of solids aren't released into the pot.  By not disturbing it, you end up with a clear, translucent juice. 


So into my stainless steel pot went five cups of juice and one box of pectin.  That got whisked together until the pectin dissolved. I brought the juice to a boil and added all of the sugar at once.


I stirred near constantly until the juice mixture came to a hard rolling boil ( a boil that cannot be stirred down).  I let that boil for one minute and then shut off the stove.  Ready to can.

The hard boil does create a foam that needs to be scooped off.  The hot jelly juice gets poured into hot jars leaving a quarter inch of head-space. Rims are wiped with a clean damp rag.  The lid gets centered on and the band gets screwed on fingertip tight.  Jars are processed in a boiling water bath for 10 minutes.  When ten minutes are up, the stove gets turned off and the jars rest in the water for an additional five minutes with the canner lid off.  Once the jars are removed, they are allowed to sit for 24 hours undisturbed.

SUCCESS !
* If you are in fact thinking of doing your own canning, please refer to a reliable source book such as The Ball Complete Book of Home Preserving for all the exact measurements and details.  Also, always check with your local extension office for changes in time, temperatures, and higher altitude conversions.

This post has been shared with Food Renegade, Make Your Own Monday, and Too Many Jars in My Kitchen.

Monday, September 10, 2012

Apples


"Putting Up Food"  - Apples


Recently, I was given about 20 pounds of apples from my fil so this weekend had me putting up apples.  There are two main ways I like to do this.  One is to make and can applesauce.  The other is is slice and freeze them.  This is the route I went this weekend.  Sliced apples are good to have on hand to make pies, apple fritters, and my favorite, apple crisp.  Like green beans, it's not hard.  Just time consuming.


First, you wanna wash all of your apples.


Next, peel and slice.  Try to keep your apples evenly sliced for even cooking times later.


Then put into a citric acid bath to prevent browning.  I use this citric acid with good results.  Just put a teaspoon of it into about a quart of water.  After slicing the apples, I put them into the citric acid bath until I have enough to put into freezer bags.


Once you have a good amount peeled and sliced, remove them from the water and allow to drain.  Four to six cups of sliced apples will yield a pie.  You can freeze accordingly depending on how thick you like your pie.  I used quart sized bags which hold four cups.  The plan is to use these apples for apple crisp.

I can almost smell the cinnamony sweet goodness baking already.  How bout you?  Putting up any goodies lately?

Friday, September 7, 2012

Quick Fix french Bread Pizza


FAST FOOD FRIDAY...

"I'm too busy to cook."  "I worked all day."  "I'm Tired."   "I don't really want to go to the store."   Who hasn't heard or even said these words before?  Should you call for pizza?  Should you pick something up from the nearest drive through?  Nope, neither.  All you need is a little Food Fore-thought.  Fast Food Friday, a planned weekly post, isn't about running out to a local restaurant for take out or calling for delivery.  Fast Food Friday is about having something on hand for those days when cooking just seems impossible or even unappealing. 

 For today, let's talk about...

The Quick Fix

I don't know what it is about pizza.  That rich spicy ooey gooey goodness is hard to resist.  It's very rare to find someone who doesn't like it.  It's a very common "fast food" that people like to order out.  Make a call, wait 30 - 40 minutes, answer the door...  extremely easy.  However, it can become a very expensive habit.  Also, when I think about it, it's not all that fast when the kids are "starving" or you have some place to be.  Which is why I'd like to share with you a quicker  at home fix that is waaaaaay cheaper as well - the French Bread Pizza.


French bread pizza is a super simple yet satisfying fix.  All you need is a pre-made loaf of french bread, some sauce, cheese, and a topping.  If you're not into making bread, pick up a loaf when you do your weekly shopping.  If you're not sure that you'll use it right away, put it in the freezer.  It keeps well especially for this purpose.  Just be sure to pull it out the morning you know you'll need it.

Otherwise, I would say most people have the sauce, cheese and topping on hand.  I like to keep cans of tomato sauce for this, but I've used leftover spaghetti sauce in a pinch.  Cheese is something I buy in bulk as well as pepperoni.  Though any left over veggies would make a great pizza or maybe even some left over shredded BBQ chicken or ham.  

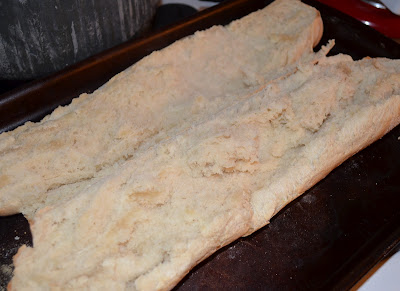
I just cut the bread lengthwise.  Preheat the oven, and start assembling.


Smother it with a good amount of sauce.  Top it with cheese.  Throw on some pepperoni.  


Bake it at 400 degrees.  After 15 minutes of baking, it's ready to serve.  While it's baking, you might throw together a salad or break out the chips and salsa.

Saving money and time... now that's what I like about fast food.

Thursday, September 6, 2012

Swiss Steak and Veggies

Stewed Swiss Steak and Veggies


I got a new book in the mail the other day for free thanks to my Swagbucks.  The book I ordered was The Prairie Girl's Guide to Life [How to sew a Sampler Quilt and 49 Other Pioneer Projects for the Modern Girl].  Catchy title for me as I've been delving into new projects to learn new skills.  The book offers up a wide range of skills from cooking, to sewing, and making healing poultices.  

Catching my eye right away was the promise of a "perfect stew".  Maybe I was hungry.  Maybe it was the cool wet weather outside.  Regardless, the promise had me getting out the ingredients to whip it up for dinner.  Admittedly, I did not have all the necessary ingredients on hand so I had to streamline it a bit.  I did follow the ever important tips to get the best stew possible...
  1. Sear the meat in a hot skillet so that it retains it juices while cooking.
  2. Deglaze the pan after removing meat so that you can reclaim all the flavor left behind in rendered fat and crispy bits.
  3. Add the reclaimed juices and bits back in with the meat.
  4. Slow roast for  two and a half hours to achieve that tender cut with a fork finish.
The result was a very tender and flavorful piece of meat.  The veggie accouterments soaked up all the good flavor and were tender without being mushy.

Here it is pictures...

Sear the meat in oil by browning on all sides in a skillet over high heat.


While that's browning, prep your veggies.  I used red new potatoes, a medium onion, and carrots.  Wash and quarter as needed. 


 After you've browned the meat, remove it to your cook ware pan.  I used my covered stoneware.
Set this aside.


 Add a cup of water to your skillet and bring it up to a boil.  Gently scrape the bottom of the skillet while boiling to release all the bits and flavor.


Top the meat with your veggies.  Add seasonings as desired.  Mine is just salt and peppered.  Pour the hot liquid over the top.  Now it's ready to be slow cooked for 2 1/2 hours at 325 degrees.


So that's the basics for getting a perfect stew.  How do you prepare yours?  Any tricks or tips up your sleeve?

Wednesday, September 5, 2012


The CSA Report 

The CSA Report  will be a regular Wednesday post from now until October.  CSA, Community Supported Agriculture, is still a relatively new term to people so I want to expand on what it is, what it's all about, and what one could get out of it.  For me, I like the idea of getting fresh local produce on a prepaid and regular basis. By joining the CSA, I've made a commitment to local farmers that financially help them start their season. In return, I get the freshest of produce and a variety that I would not normally think to buy.  So I'll also be getting creative in the kitchen.


Week Fourteen...


What an excellent variety this week from the CSA - corn, peppers, green beans, seedless cucumber, tomatoes, garlic, onions, and potatoes.  I think with all the tomatoes rolling in, it's nearly time to make sauce for homemade pizza.  I like to keep it in the freezer in snack size ziplock bags.  It's the perfect size for pizza.  I'll put up a tutorial when the time comes.

On another note, my FIL sent me about twenty pounds of apples off of his trees.  Looks like it's time to make applesauce too.  I just love filling the cabinets and freezer with things to eat during the fall and winter.  I need to buy a bulk of sweet corn to freeze, but am still watching for the right price.  Last I saw it, it was $5 for a dozen.  Seems higher than I remember.  

Tuesday, September 4, 2012

Eating Our Veggies...

Squash, Zucchini, and Green Tomatoes

I know it feels like summer is over.  The kids are back in school.  Labor Day has passed.  The days are getting shorter.  However, the truth is that summer still has a few good weeks, and that means that gardens are still going strong.  The CSA even referred to this time as the height of tomato season.  In short, local fresh veggies are still rolling in so I thought I'd share method for serving them.

I restrain myself from calling this a recipe.  Can something whose ingredients are so few ( three in this case) even be called a recipe?  Nah, I don't think so.  This method calls for dipping, dredging, and frying.  It's uses are many...  fried meats, cheeses, veggies, and even sweets.  Lately, this is how we've been eating our veggies.

Fried Yellow Squash

You'll need the following:

Oil for frying
2 eggs beaten in a small bowl
2 cups of flour spread out on a plate
2 medium sized squash or zucchini or 4-5 green tomatoes

The method is easy enough.  Preheat oil in a skillet over medium high heat.  You'l want it to be around 350 degrees. Slice your vegetables to 1/4 of an inch.  Dip them into the beaten eggs.  Place dipped slice in flour. Flip it so flour covers both sides.  Test oil by drizzling a little egg into the oil.  If it bubbles up then it's ready.  Place slices in oil and fry for 4-5 minutes or until golden brown.

You can see the edges are browning indicating it's time to flip.
Flip and fry the remaining side the same.


Place fried pieces onto paper towel to drain.  I like to salt and pepper them while they are still hot and moist with oil.  The salt sticks better then.  Did I mention that this isn't the healthiest way to eat a veggie?  Salt and oil - all in moderation, right?  Oh yeah, then there is the ranch dressing you'll want to dip then in before eating.  Huh, more than three ingredients.  Maybe this is a recipe after all ;)

Enjoy.